
Coupon Carrier is a promotional tool to help you gain email subscribers or foot traffic by delivering unique time-sensitive discounts and coupons to your email subscribers — Connects directly to your favorite email service provider and e-commerce platform.
A commonly used way to incentivize visitors to sign up to your email list is to give them a discount code to use towards their first purchase. Most store owners send out a fixed discount code to all new subscribers, and there are several problems with this approach:
Coupon Carrier solves these problems by monitoring your email list for new subscribers. When someone signs up, it creates a unique personal discount code in your Shopify store and delivers it to the new subscriber.
You can configure Coupon Carrier based on your preferences regarding the type of discount code, and it's value and expiry date. For example, send a 10% discount code, valid for seven days, to all new email subscribers.
The first step is to sign up for a Coupon Carrier account if you haven't done that already. You can use the 7-day free trial to try our service, and once you're ready to use it in production, you can subscribe to one of our plans.
Coupon Carrier uses code lists where the unique codes are stored. You can import your own set of codes or connect to your e-commerce store if you want them to be created automatically, which is what we will do here.
In the Code List tab, create a new code list and choose to create an Autogenerated code list. Pick Shopify as the integration and connect it to your store using your credentials. Once created, you can configure your discount value and expiry settings.
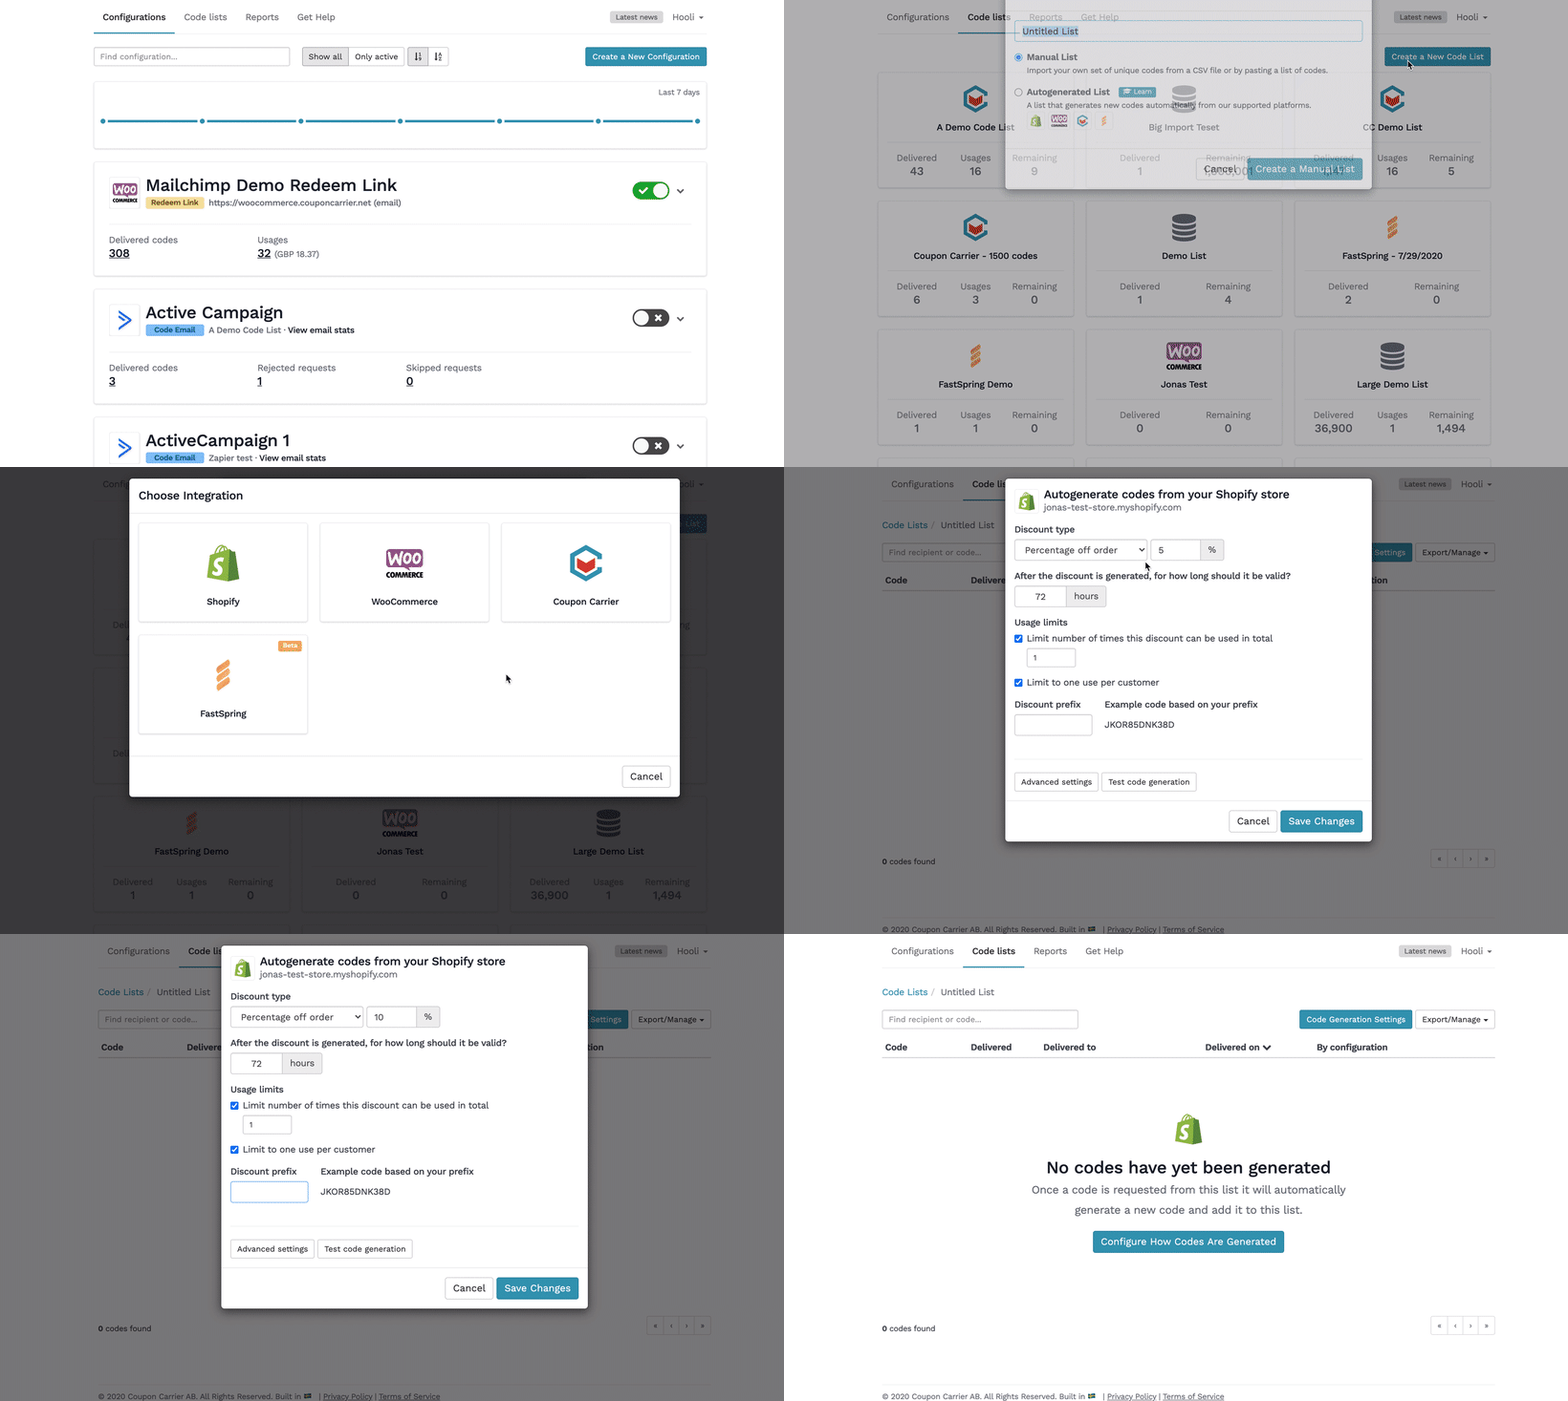
Now that we have a list of codes, we want to deliver them to our new Mailchimp subscribers. We'll use a Code Email configuration that can connect to your Mailchimp account and monitor a specific email list for new subscribers.
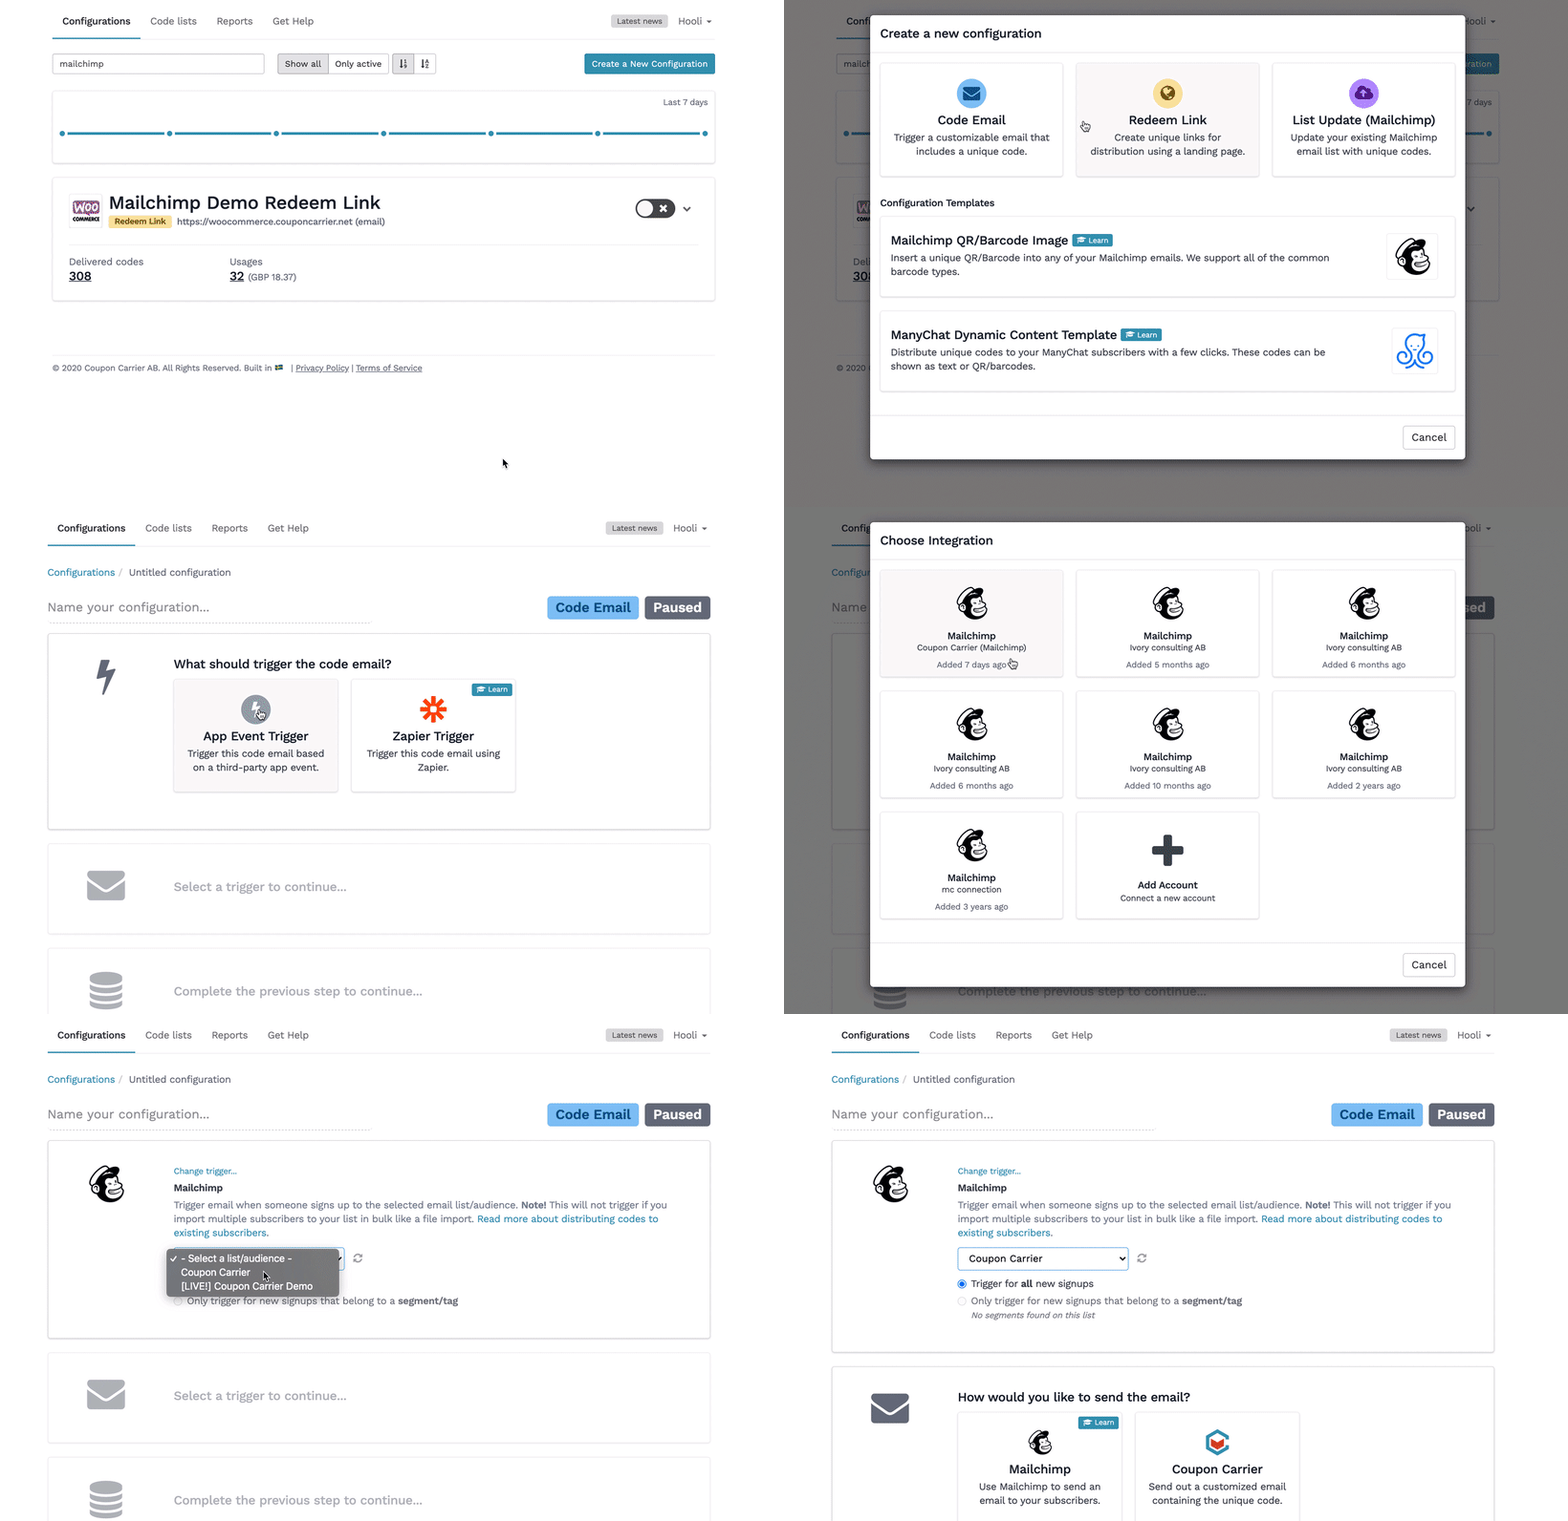
When Mailchimp triggers this Code Email, a unique discount code will be created in Shopify. The next step is to deliver this code to the new subscriber. There are two different ways you can do this:
This time, we'll tell Coupon Carrier to store the newly created discount code in the new subscriber's merge field and then let Mailchimp send out a welcome email where the code is included. Let's select Mailchimp as the email sender and create a new list field that we'll use to store the code in.
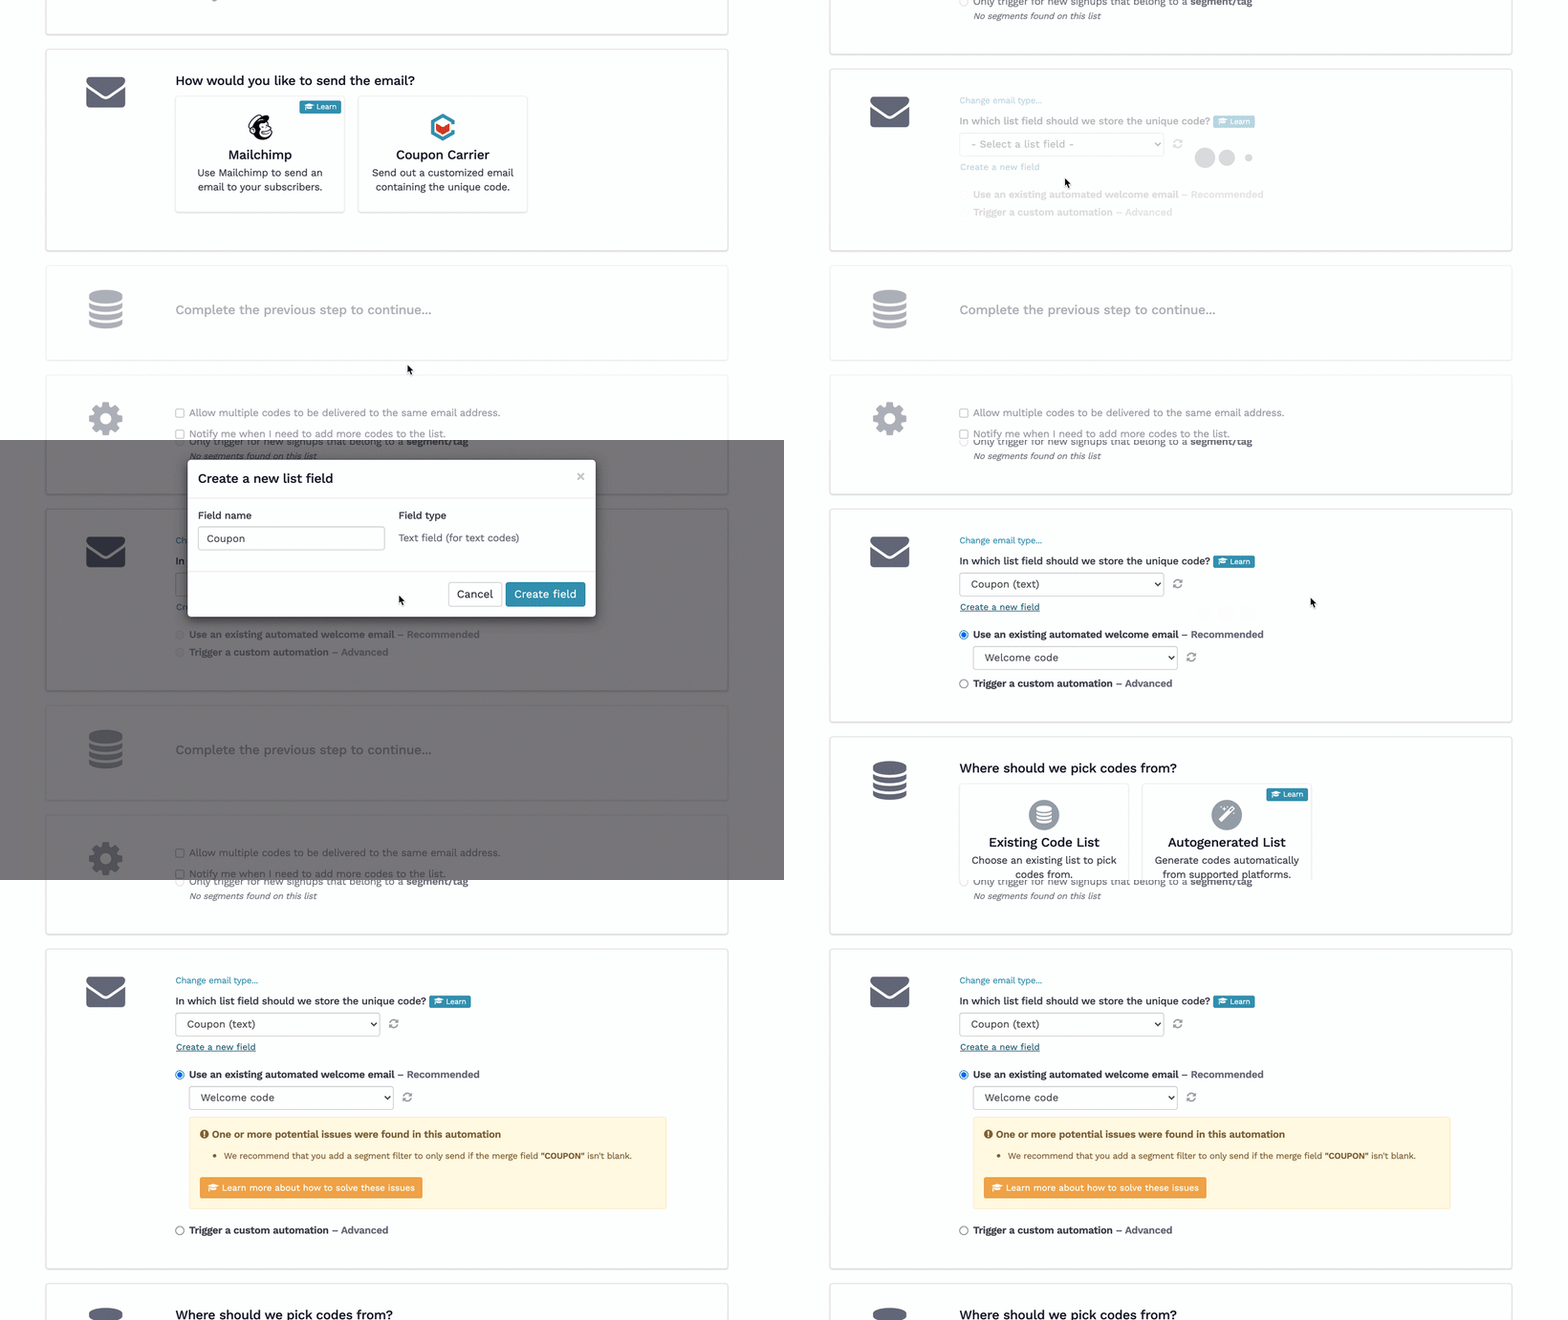
Coupon Carrier will inspect the settings when you select an existing Mailchimp automation and let you know if any recommended changes should be made. In most cases, there are two things we need to change:
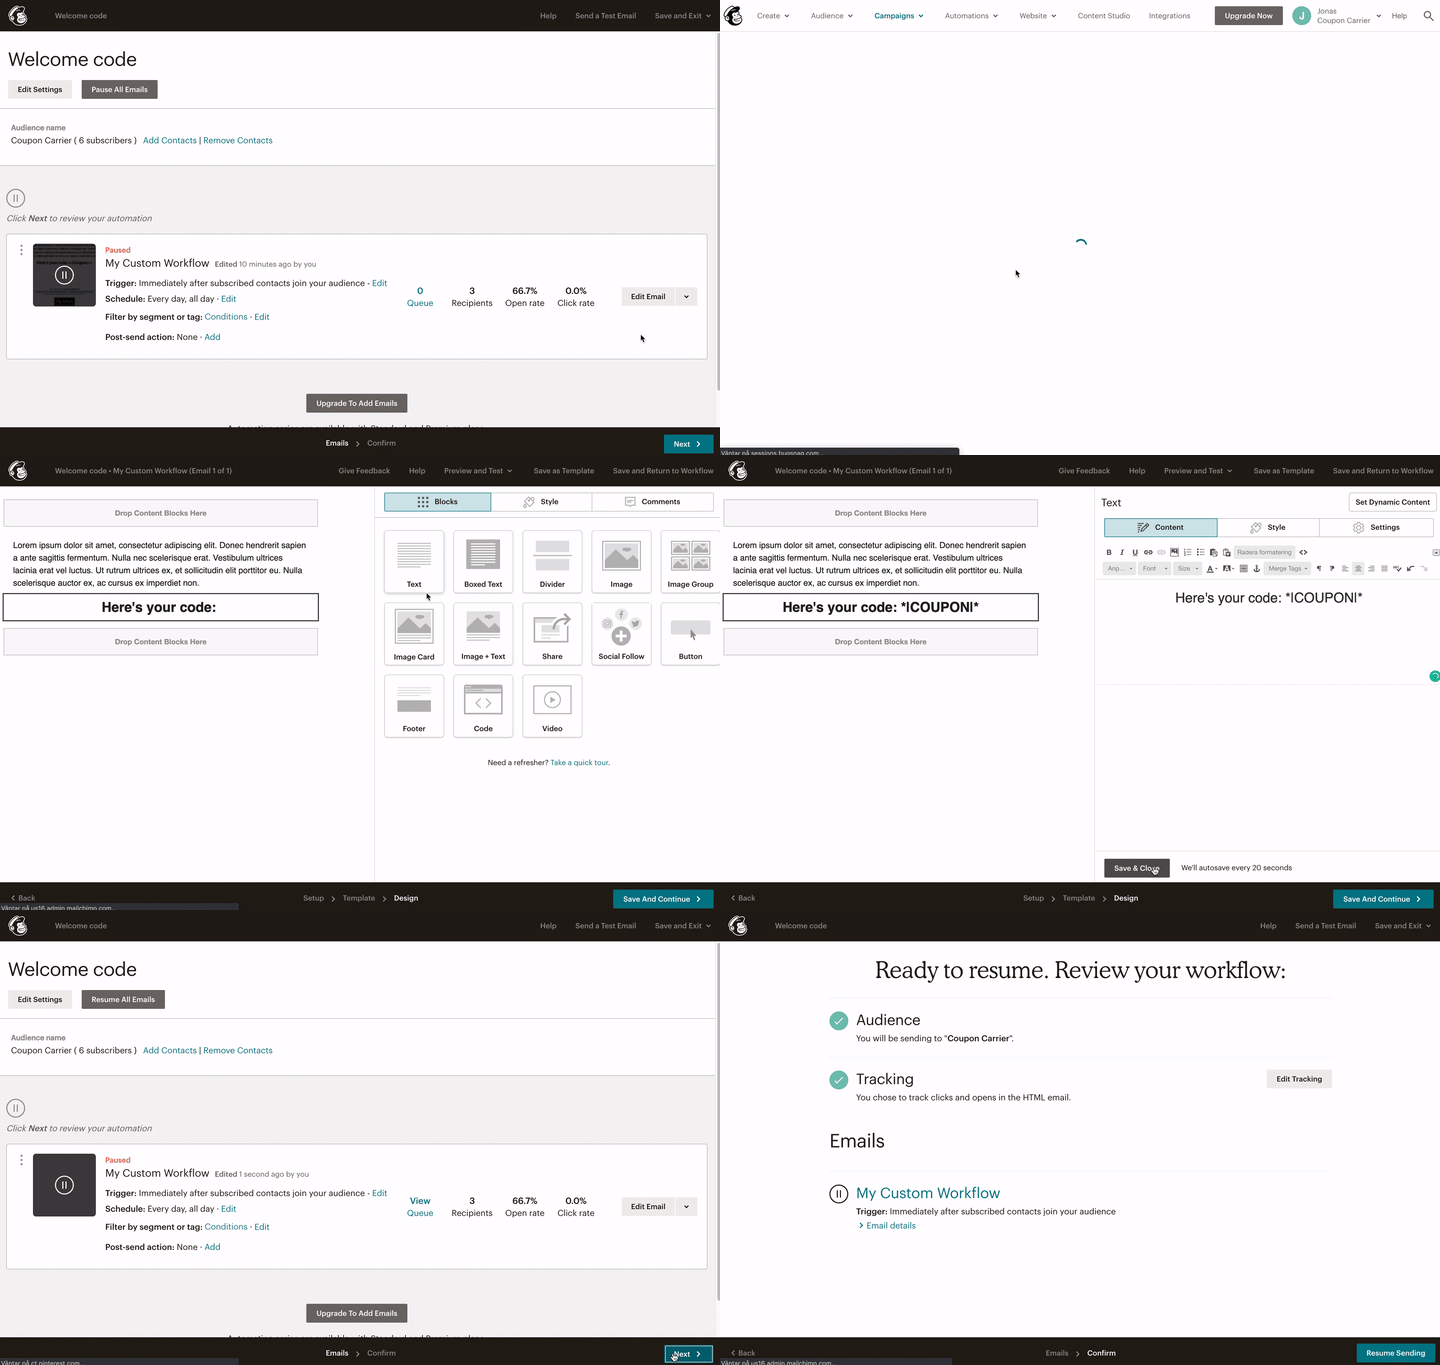
Start by pausing your automation so that it can be modified. Add a segment condition to prevent the email from being sent until the "Coupon" field isn't blank. That way, if Coupon Carrier takes a few seconds to create and apply the code to this field, Mailchimp won't send out the email without a code in it.
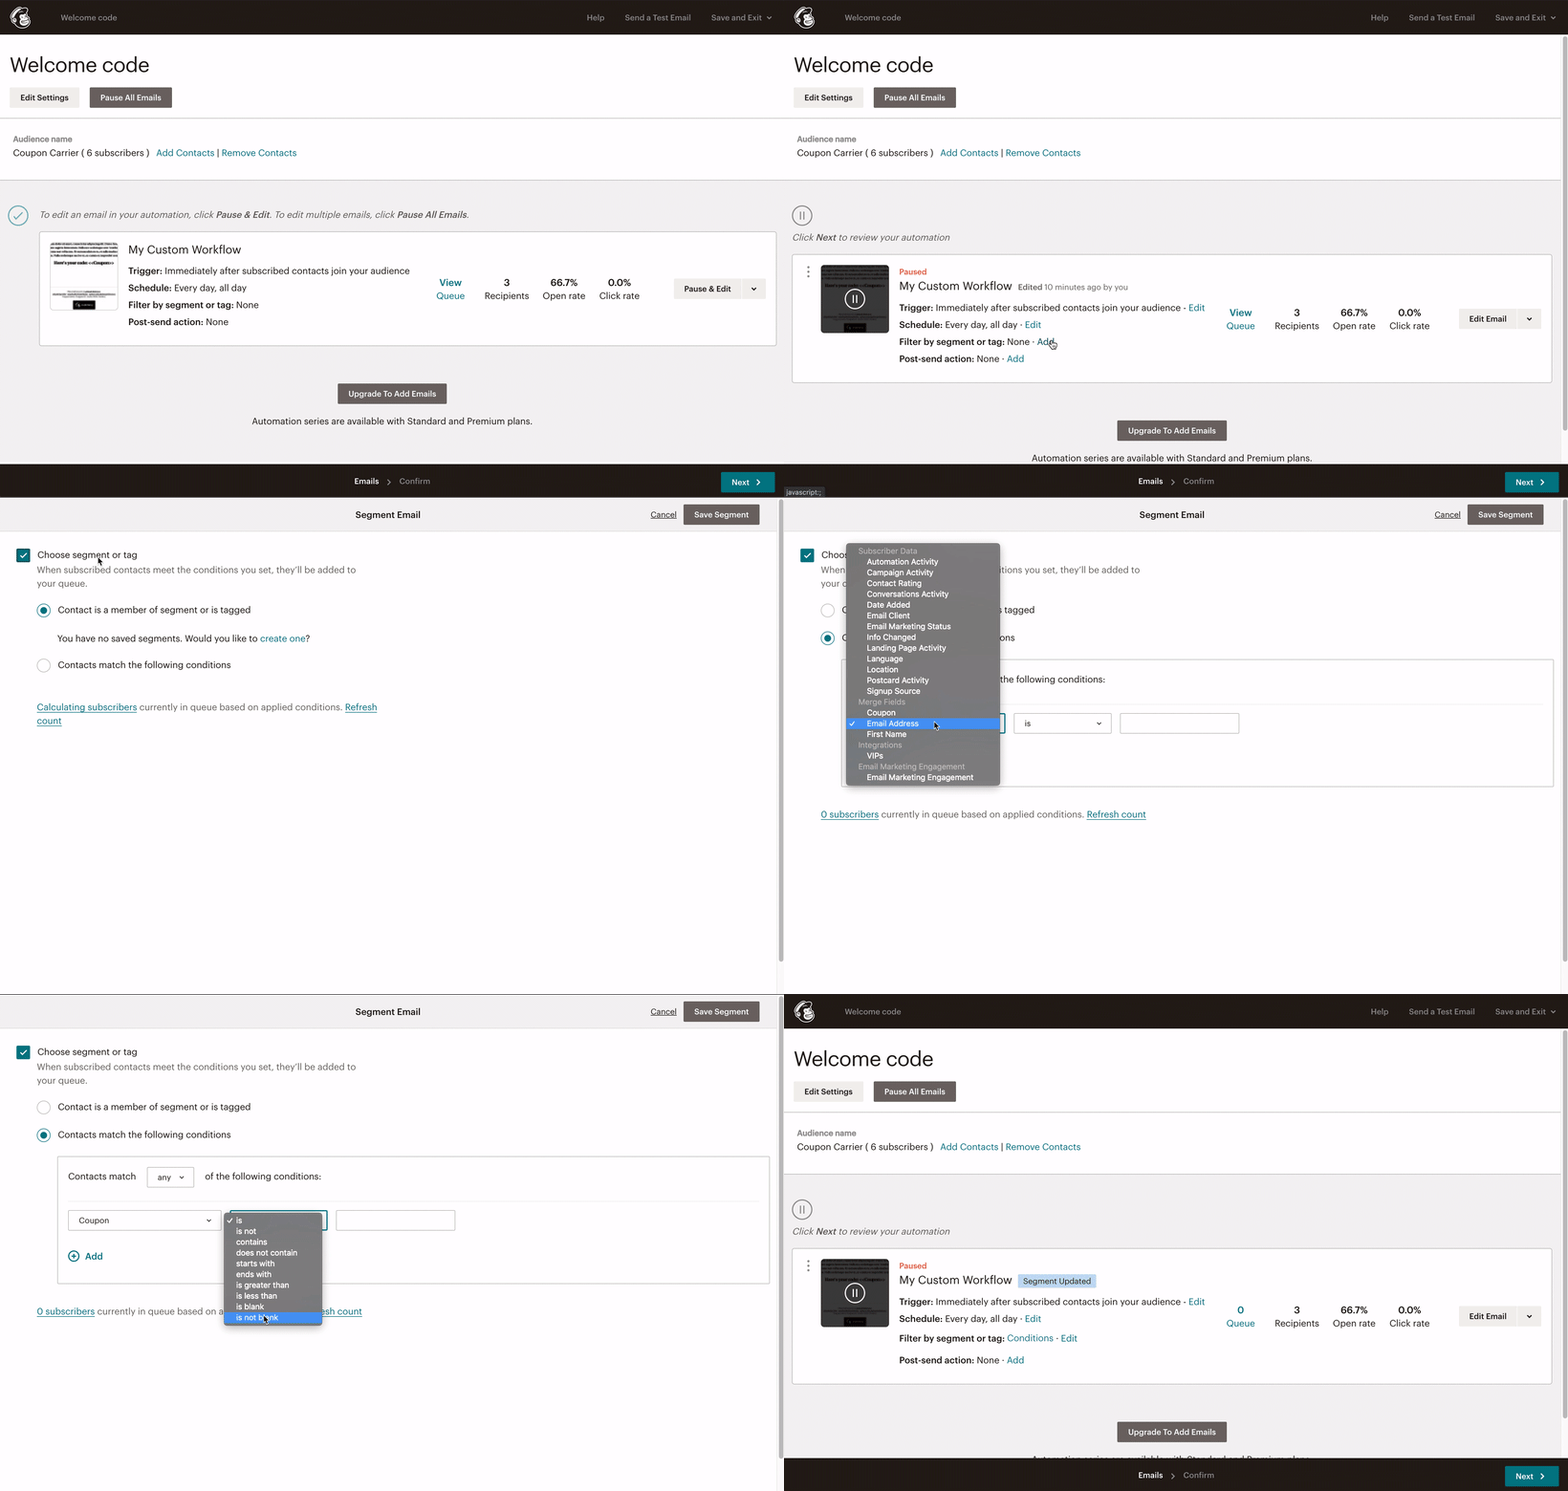
Next, edit the email content and include the merge tag (*|COUPON|*) in the email where you'd like the code to be shown. Remember to save and start your automation.
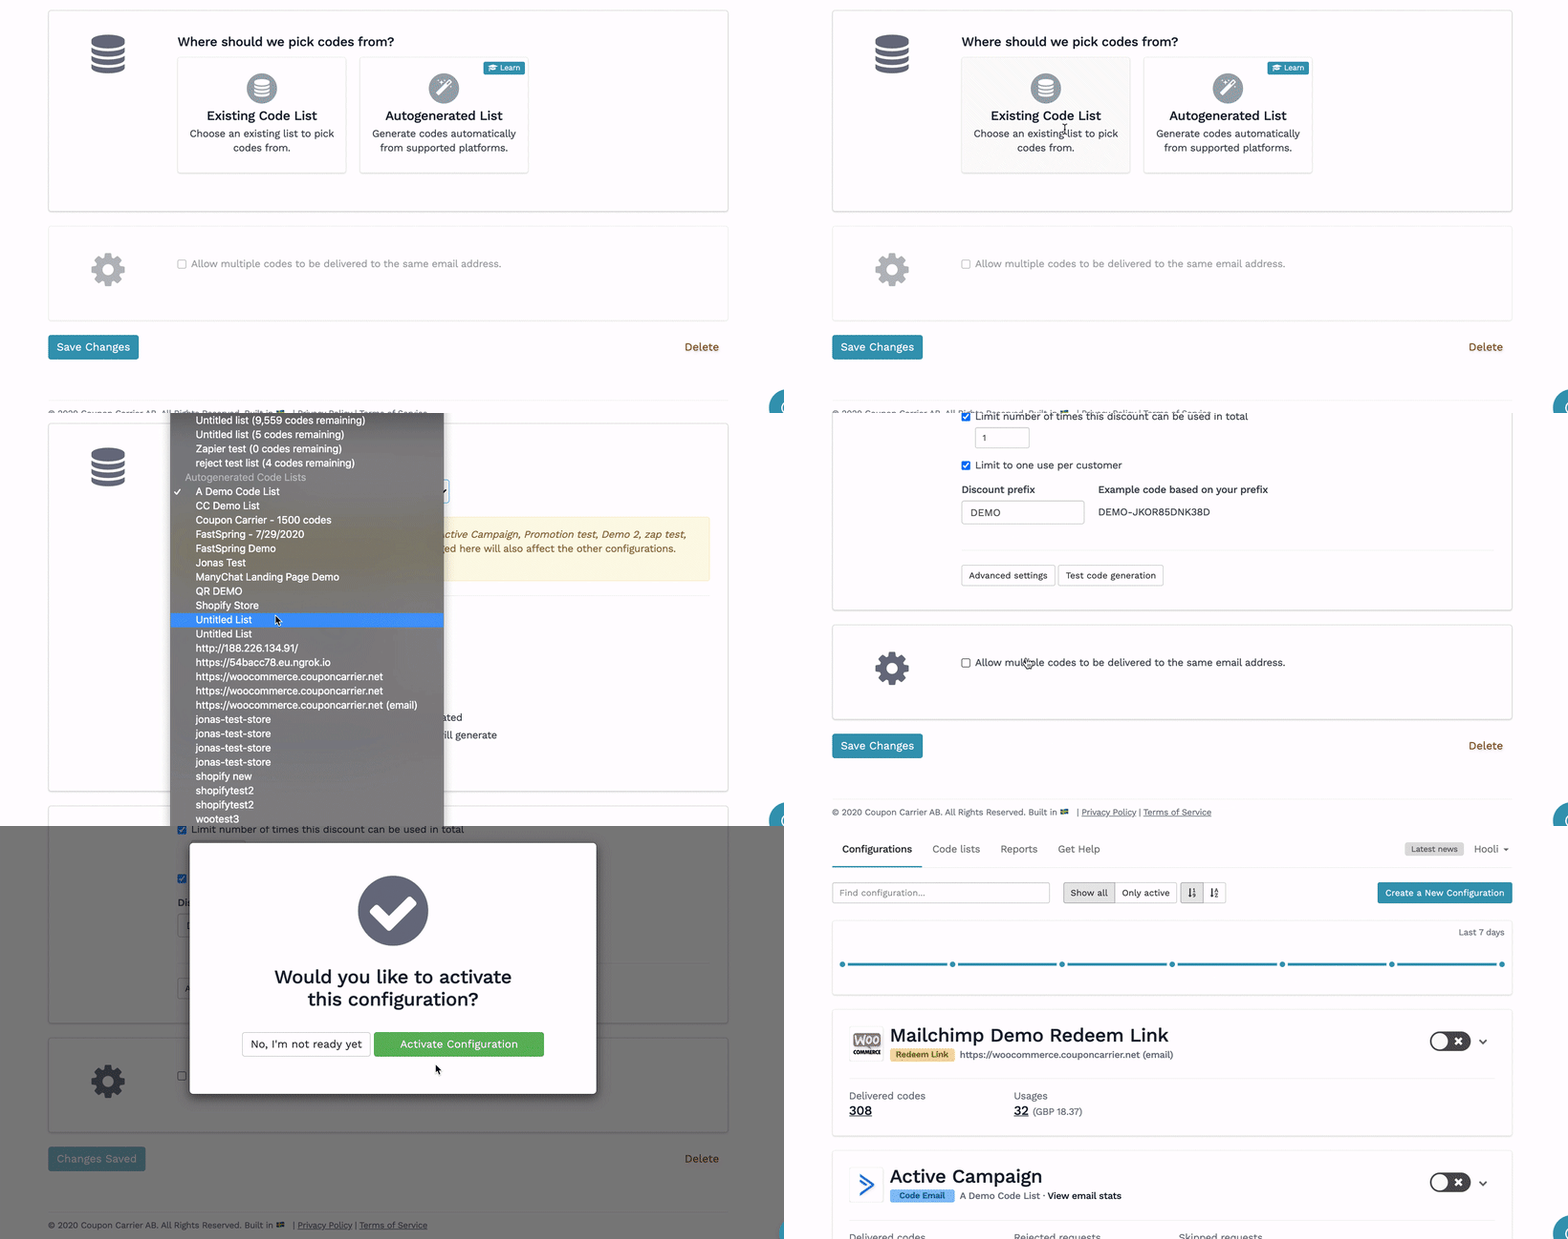
Switch back to Coupon Carrier, where you can finish setting up the Code Email by selecting an existing code list as the code source. You should find the code list that we created earlier. That's it, save your changes, and activate your configuration.
To test the integration, sign up for your email list, either from your website or by adding a new subscriber directly into the email list from within Mailchimp.
Coupon Carrier offers you statistics on codes delivered, used, and total order value — view reports and, if needed, export all data from the code lists.